

Owner's Manual
Instafarm® 9-Tray Growing Unit
Welcome to the Instafarm family! We've intentionally designed our products to add real value to your life and health, and our team is standing by to help along the way. Here's everything you need to get growing, keep your unit happy, and harvest at your best.
Getting Started
Place the unit in your preferred location and plug it into a standard 110V outlet.
Fill the tank with filtered water and set it on the dock at the left side of the unit. Avoid tap water — it can clog the spray nozzle over time.
Remove the tray lids and place the trays you want to grow into the tray slots. This can be done any time before or after the unit is powered on.
Press the power button to turn the unit on. The Instafarm takes it from here — let the microgreens begin!
Enjoy having a piece of nature in your home, and get excited to start harvesting fresh nutrition.
Harvest, eat, smile.
Harvesting Notes
For best freshness, harvest within 2–3 days of the estimated ready-to-harvest time (7 days for most plants). If you can't harvest right away, keep the tray in the fridge until you do.
Use scissors to cut microgreens near the top surface of the tray. It's normal for some seed hulls to stay on the leaves — brush them off or eat them with the plant.
Once you start harvesting a tray, it's best to remove it from the Instafarm and store it on the counter or in the fridge, so it doesn't get overwatered before you finish it.
Eat your greens as soon as possible after harvesting for maximum nutrition.
Most people notice the biggest difference when they consistently eat one tray of microgreens a day — sometimes split between 2–3 people. Replacing a tray as soon as you harvest it keeps 1–2 trays ready every day.
Frequently Asked Questions
Tap a question to expand it.
Once a tray is placed, it's best to leave it in that same slot until it's ready for harvest. This lets the Instafarm precisely control the growth settings for that specific tray.
Instafarm trays are designed for one-time use, and most won't regrow a second round. Many trays can be transplanted into a larger pot or your garden to grow the full-size plant after harvest. We don't recommend returning a harvested or partially harvested tray to the unit — it can confuse the watering algorithm. If this happens by accident, leave that slot empty for 90+ minutes, then place a new tray in it to reset.
Yes. The light typically runs 24/7, but a quick press of the power button puts the unit into Night Mode. Plants keep watering, but the light stays off for 10 hours before automatically turning back on — the indicator light glows blue while in Night Mode. Quick-press the button any time to exit early.
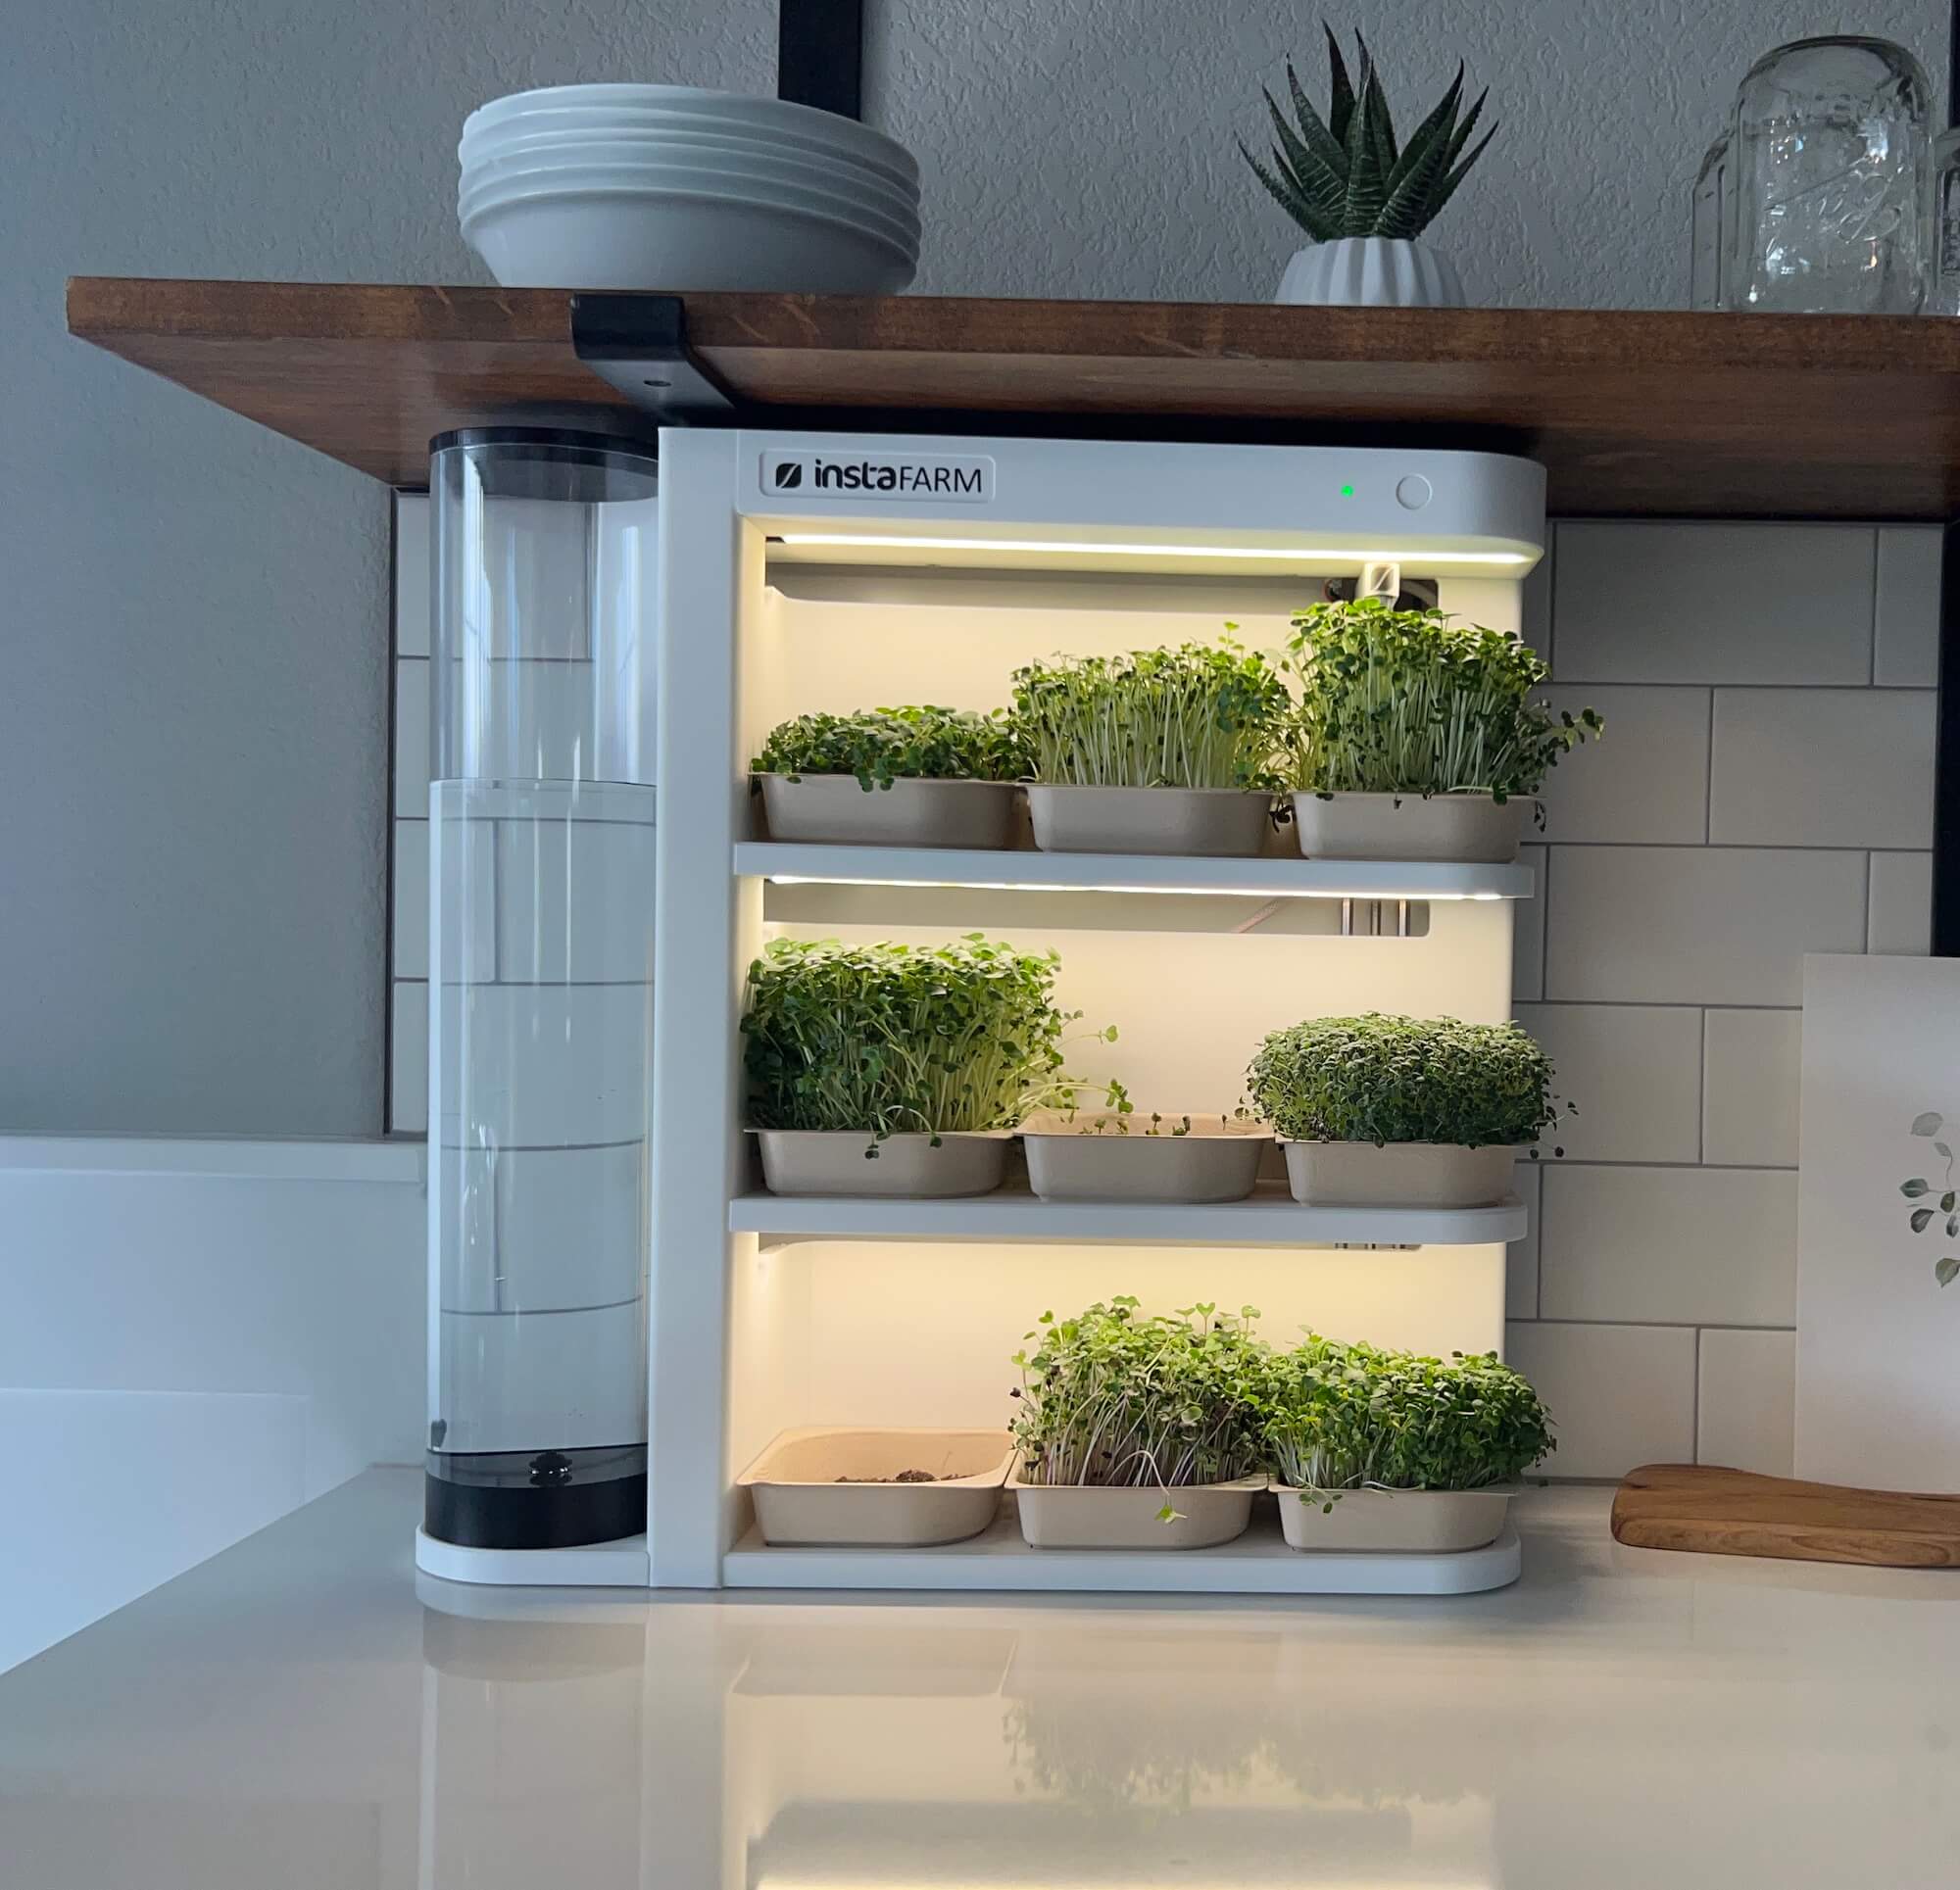
Staying under 10 hours of Night Mode a day (one full cycle) has very minimal impact on plant growth.
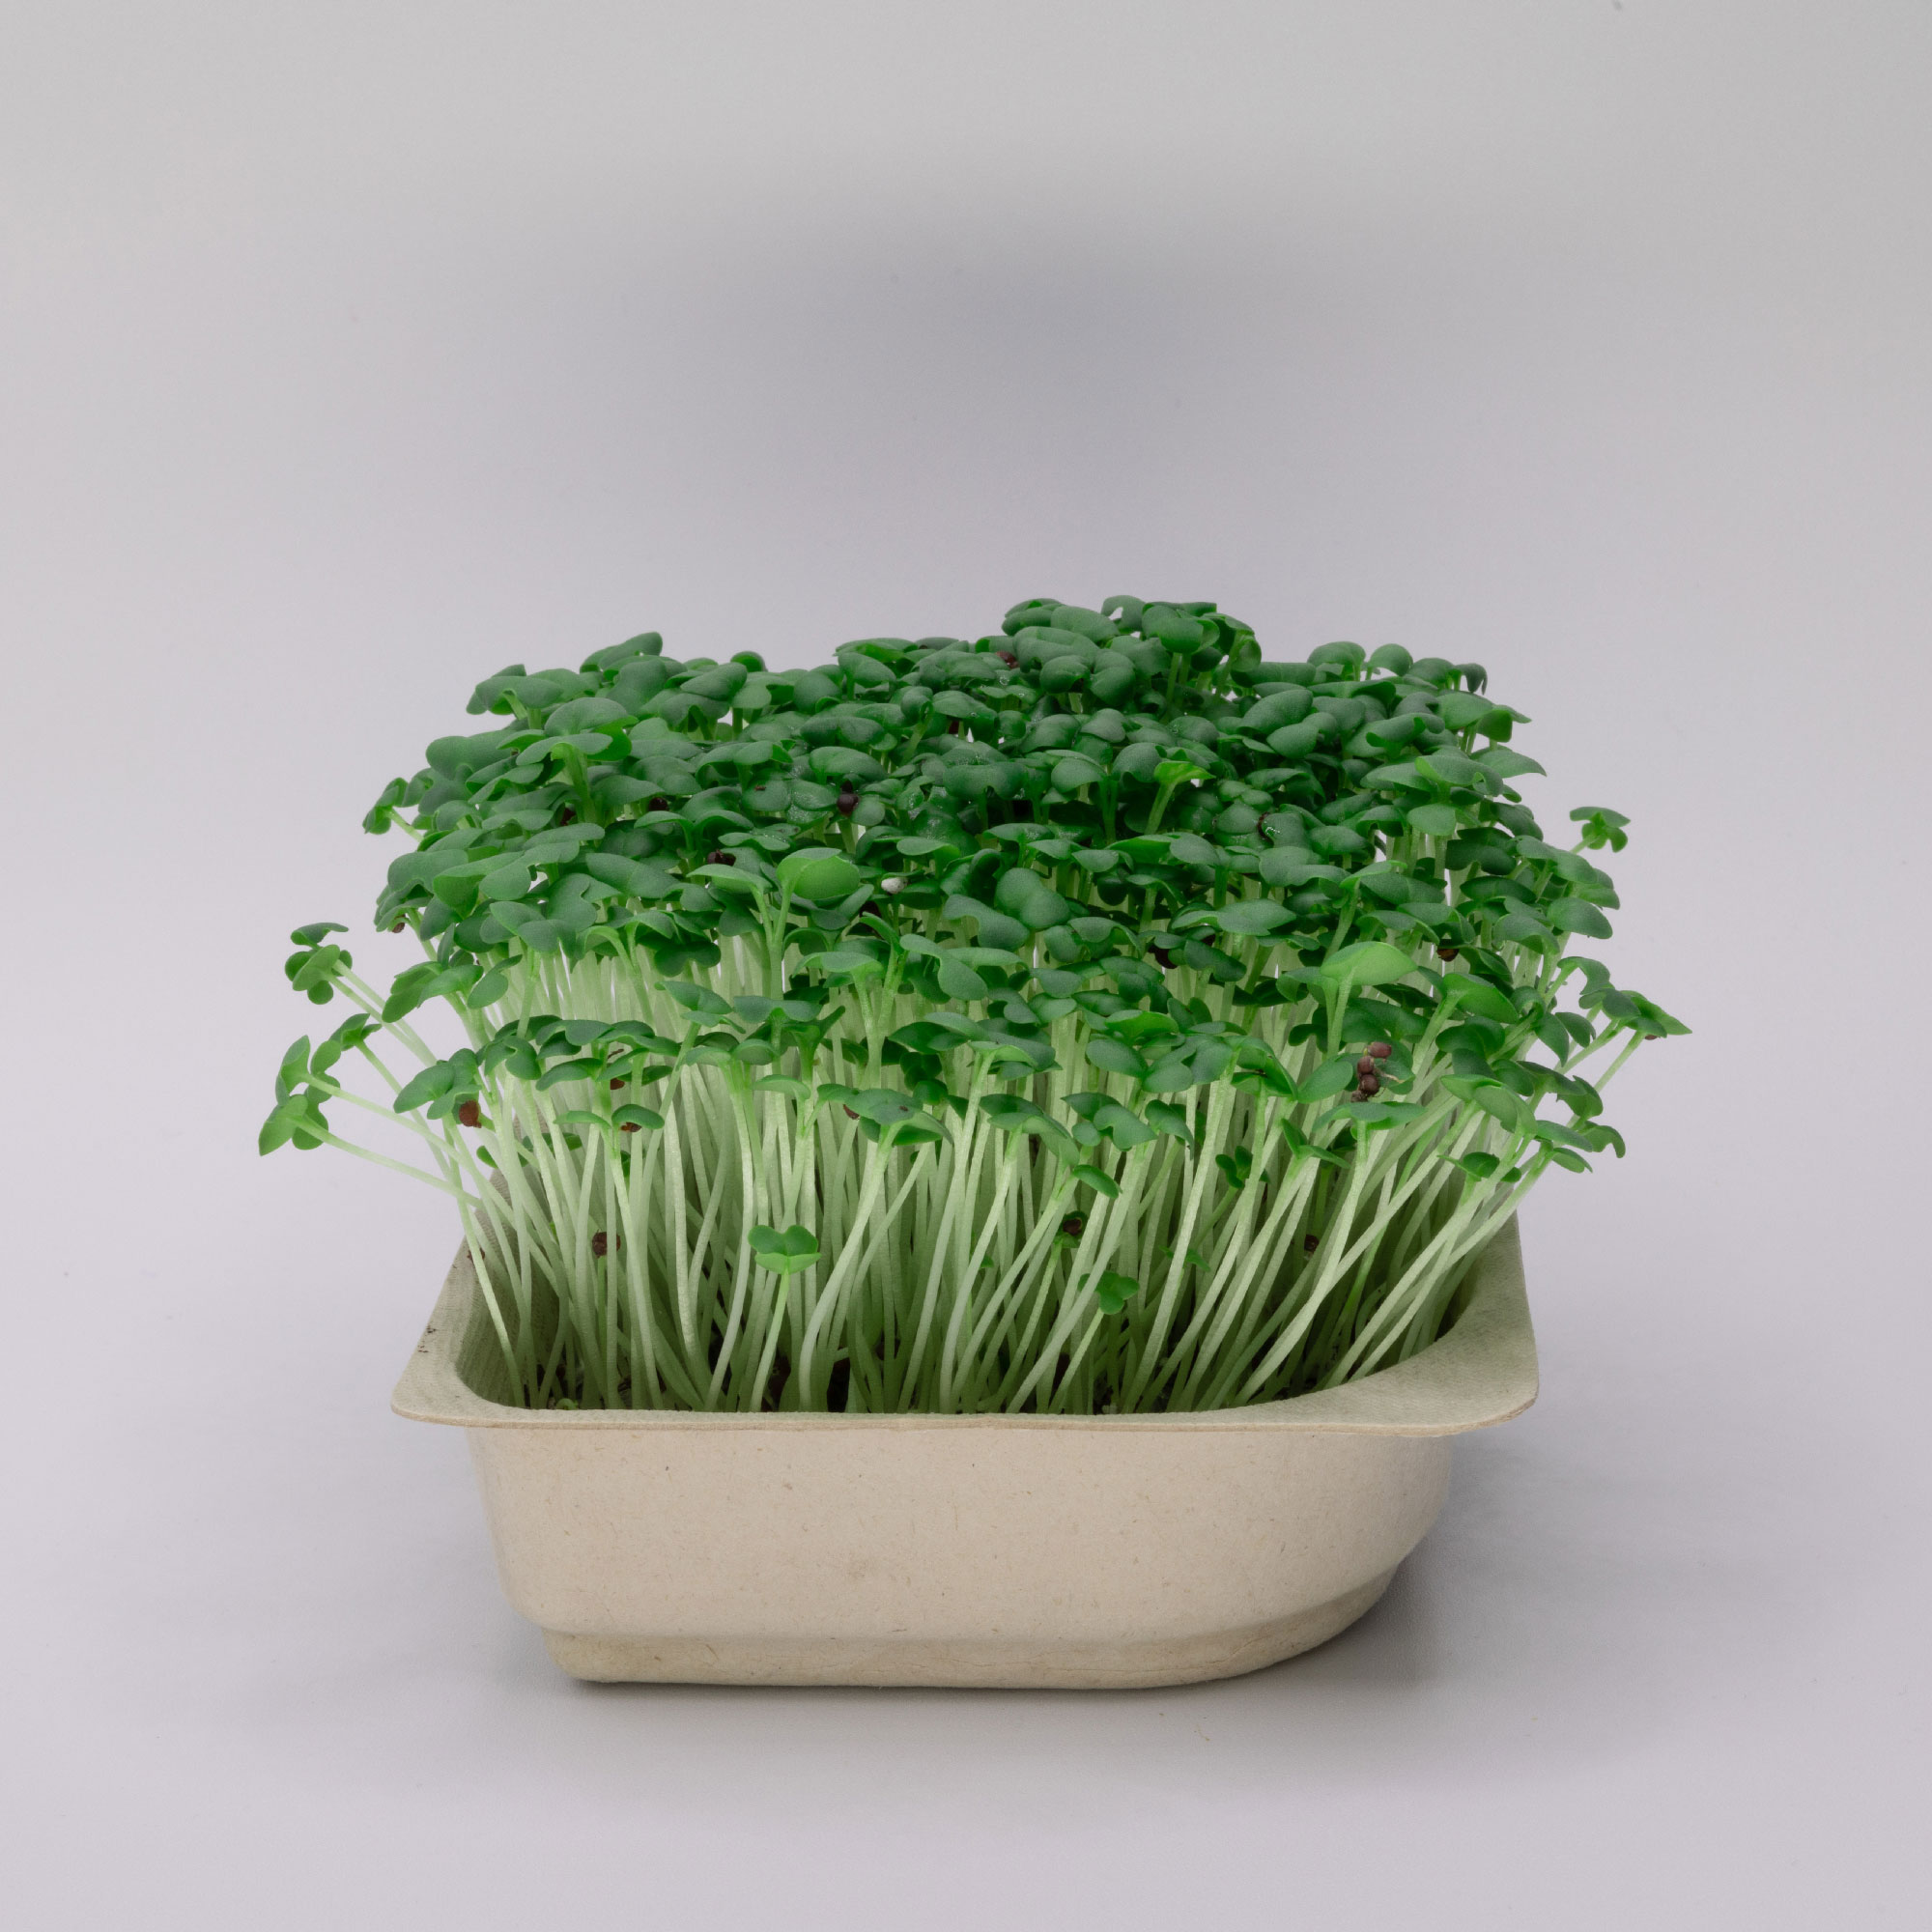
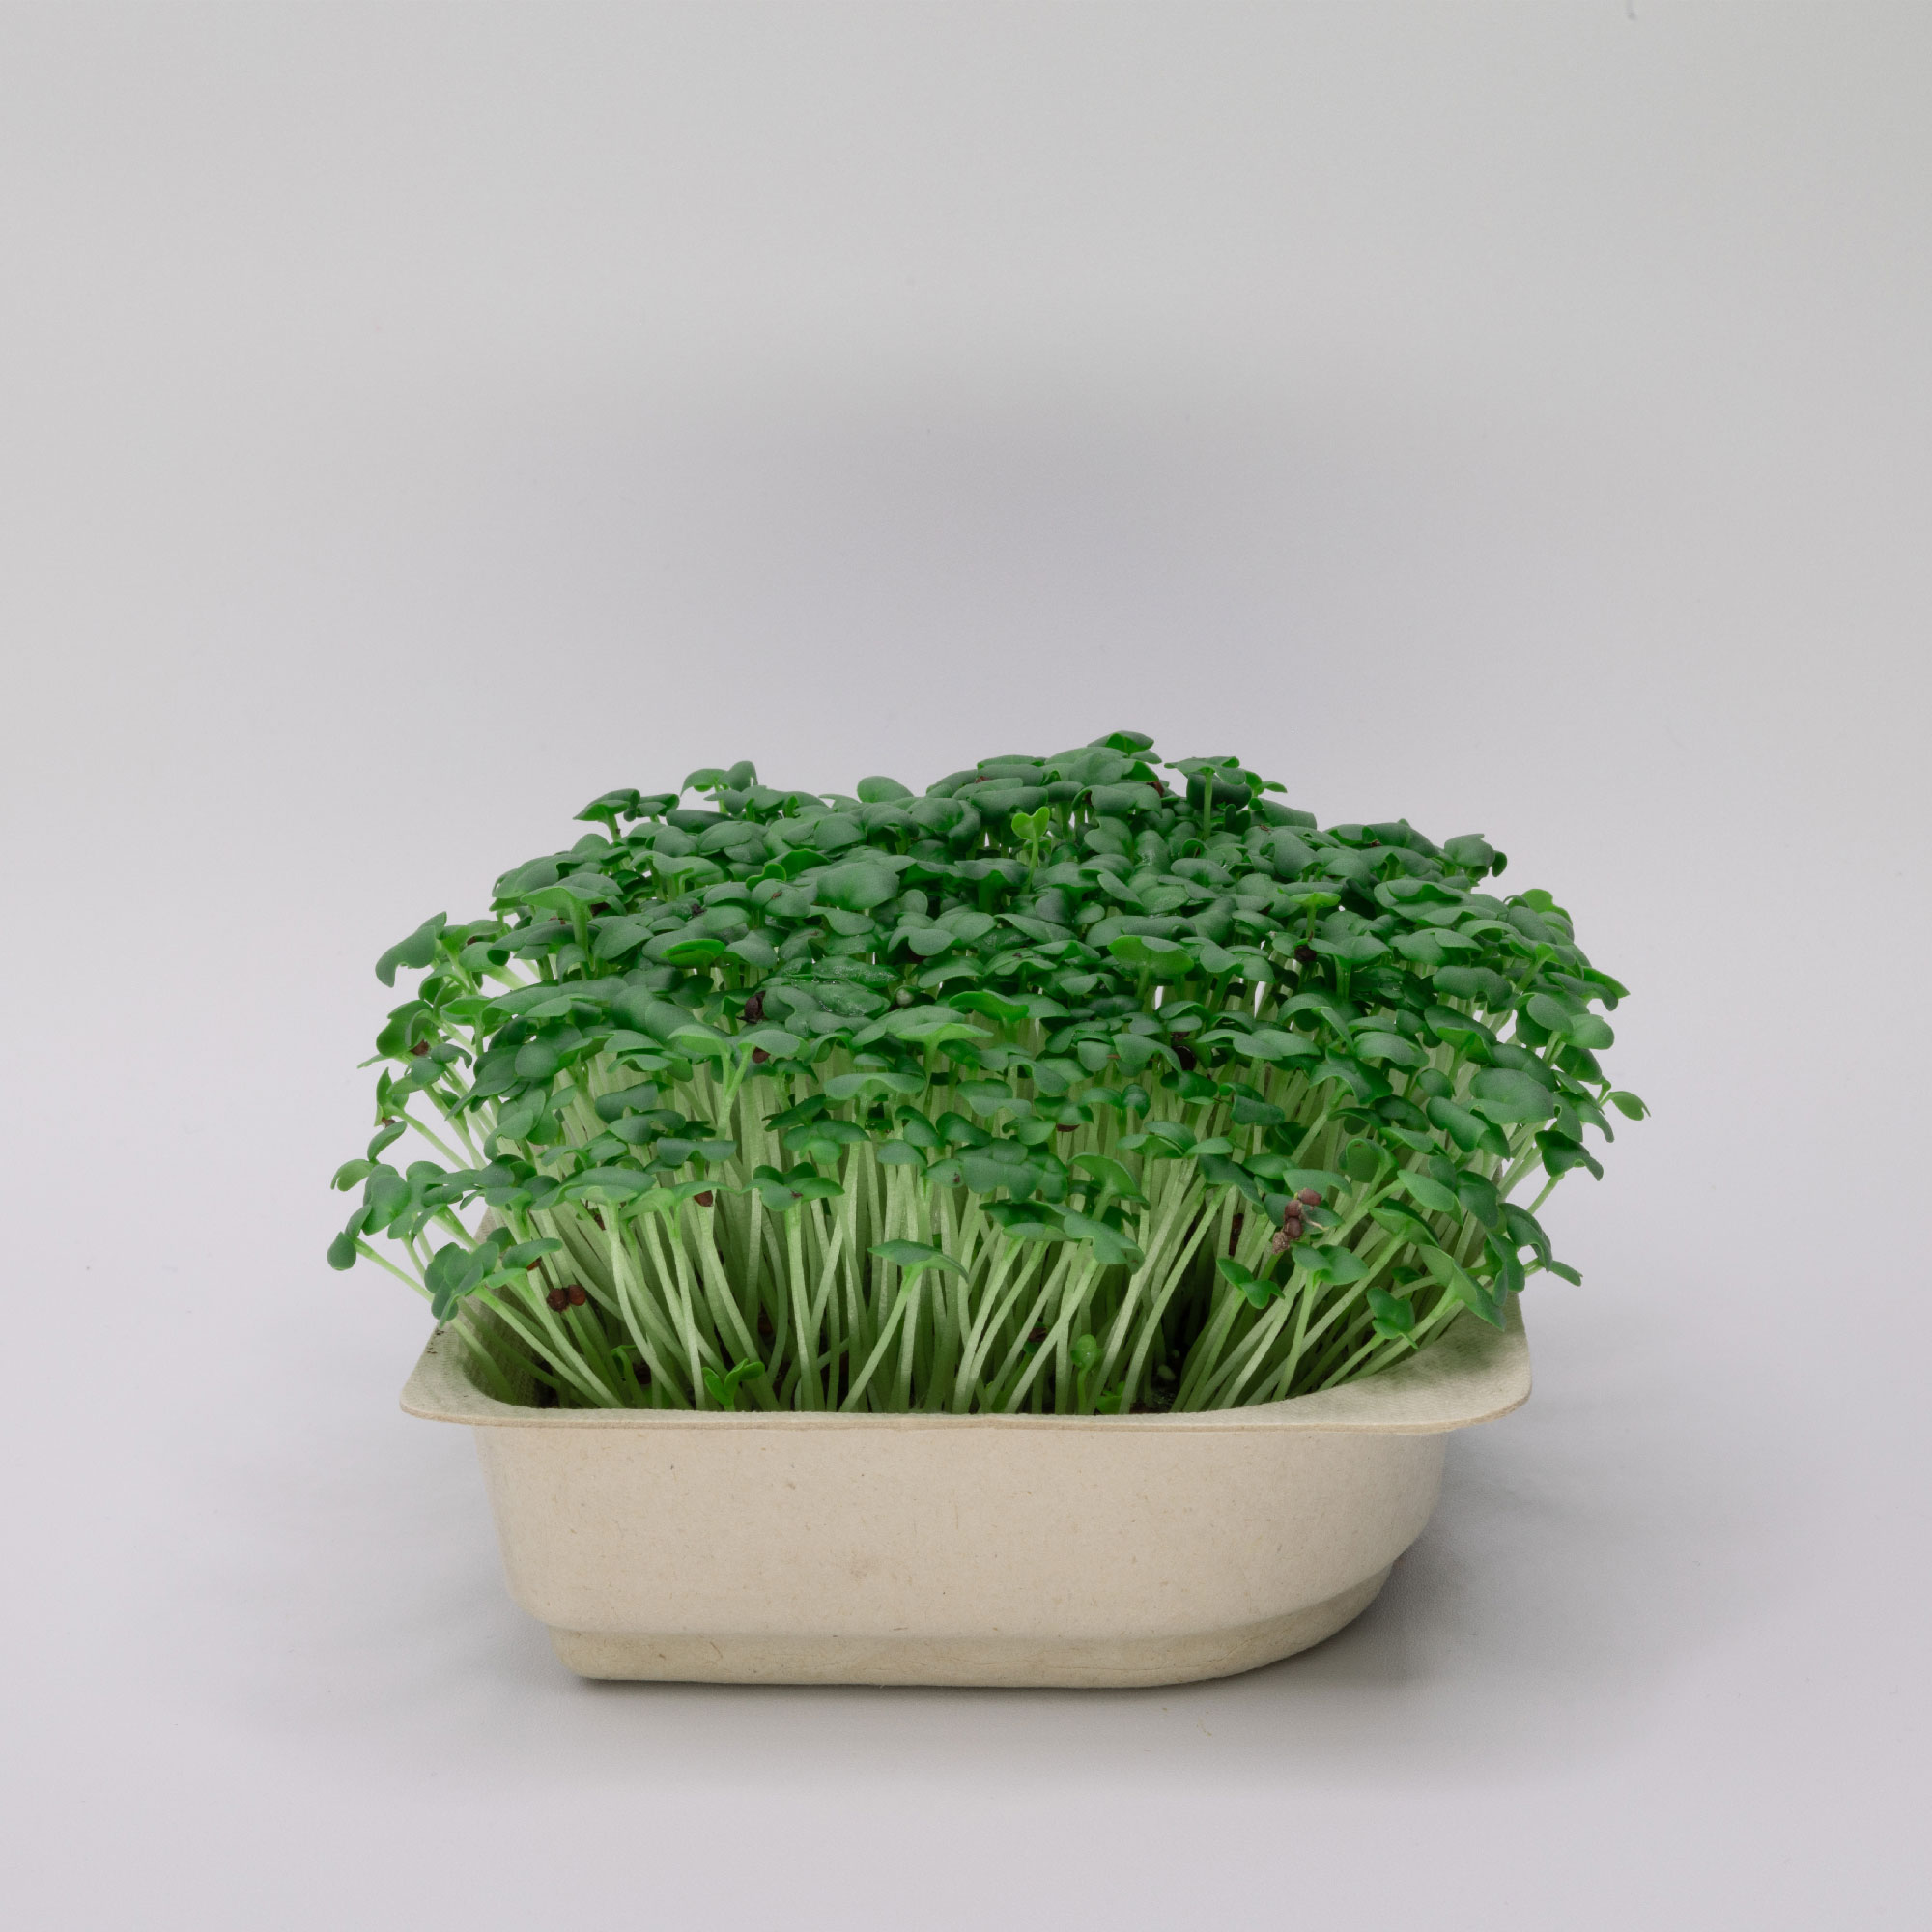
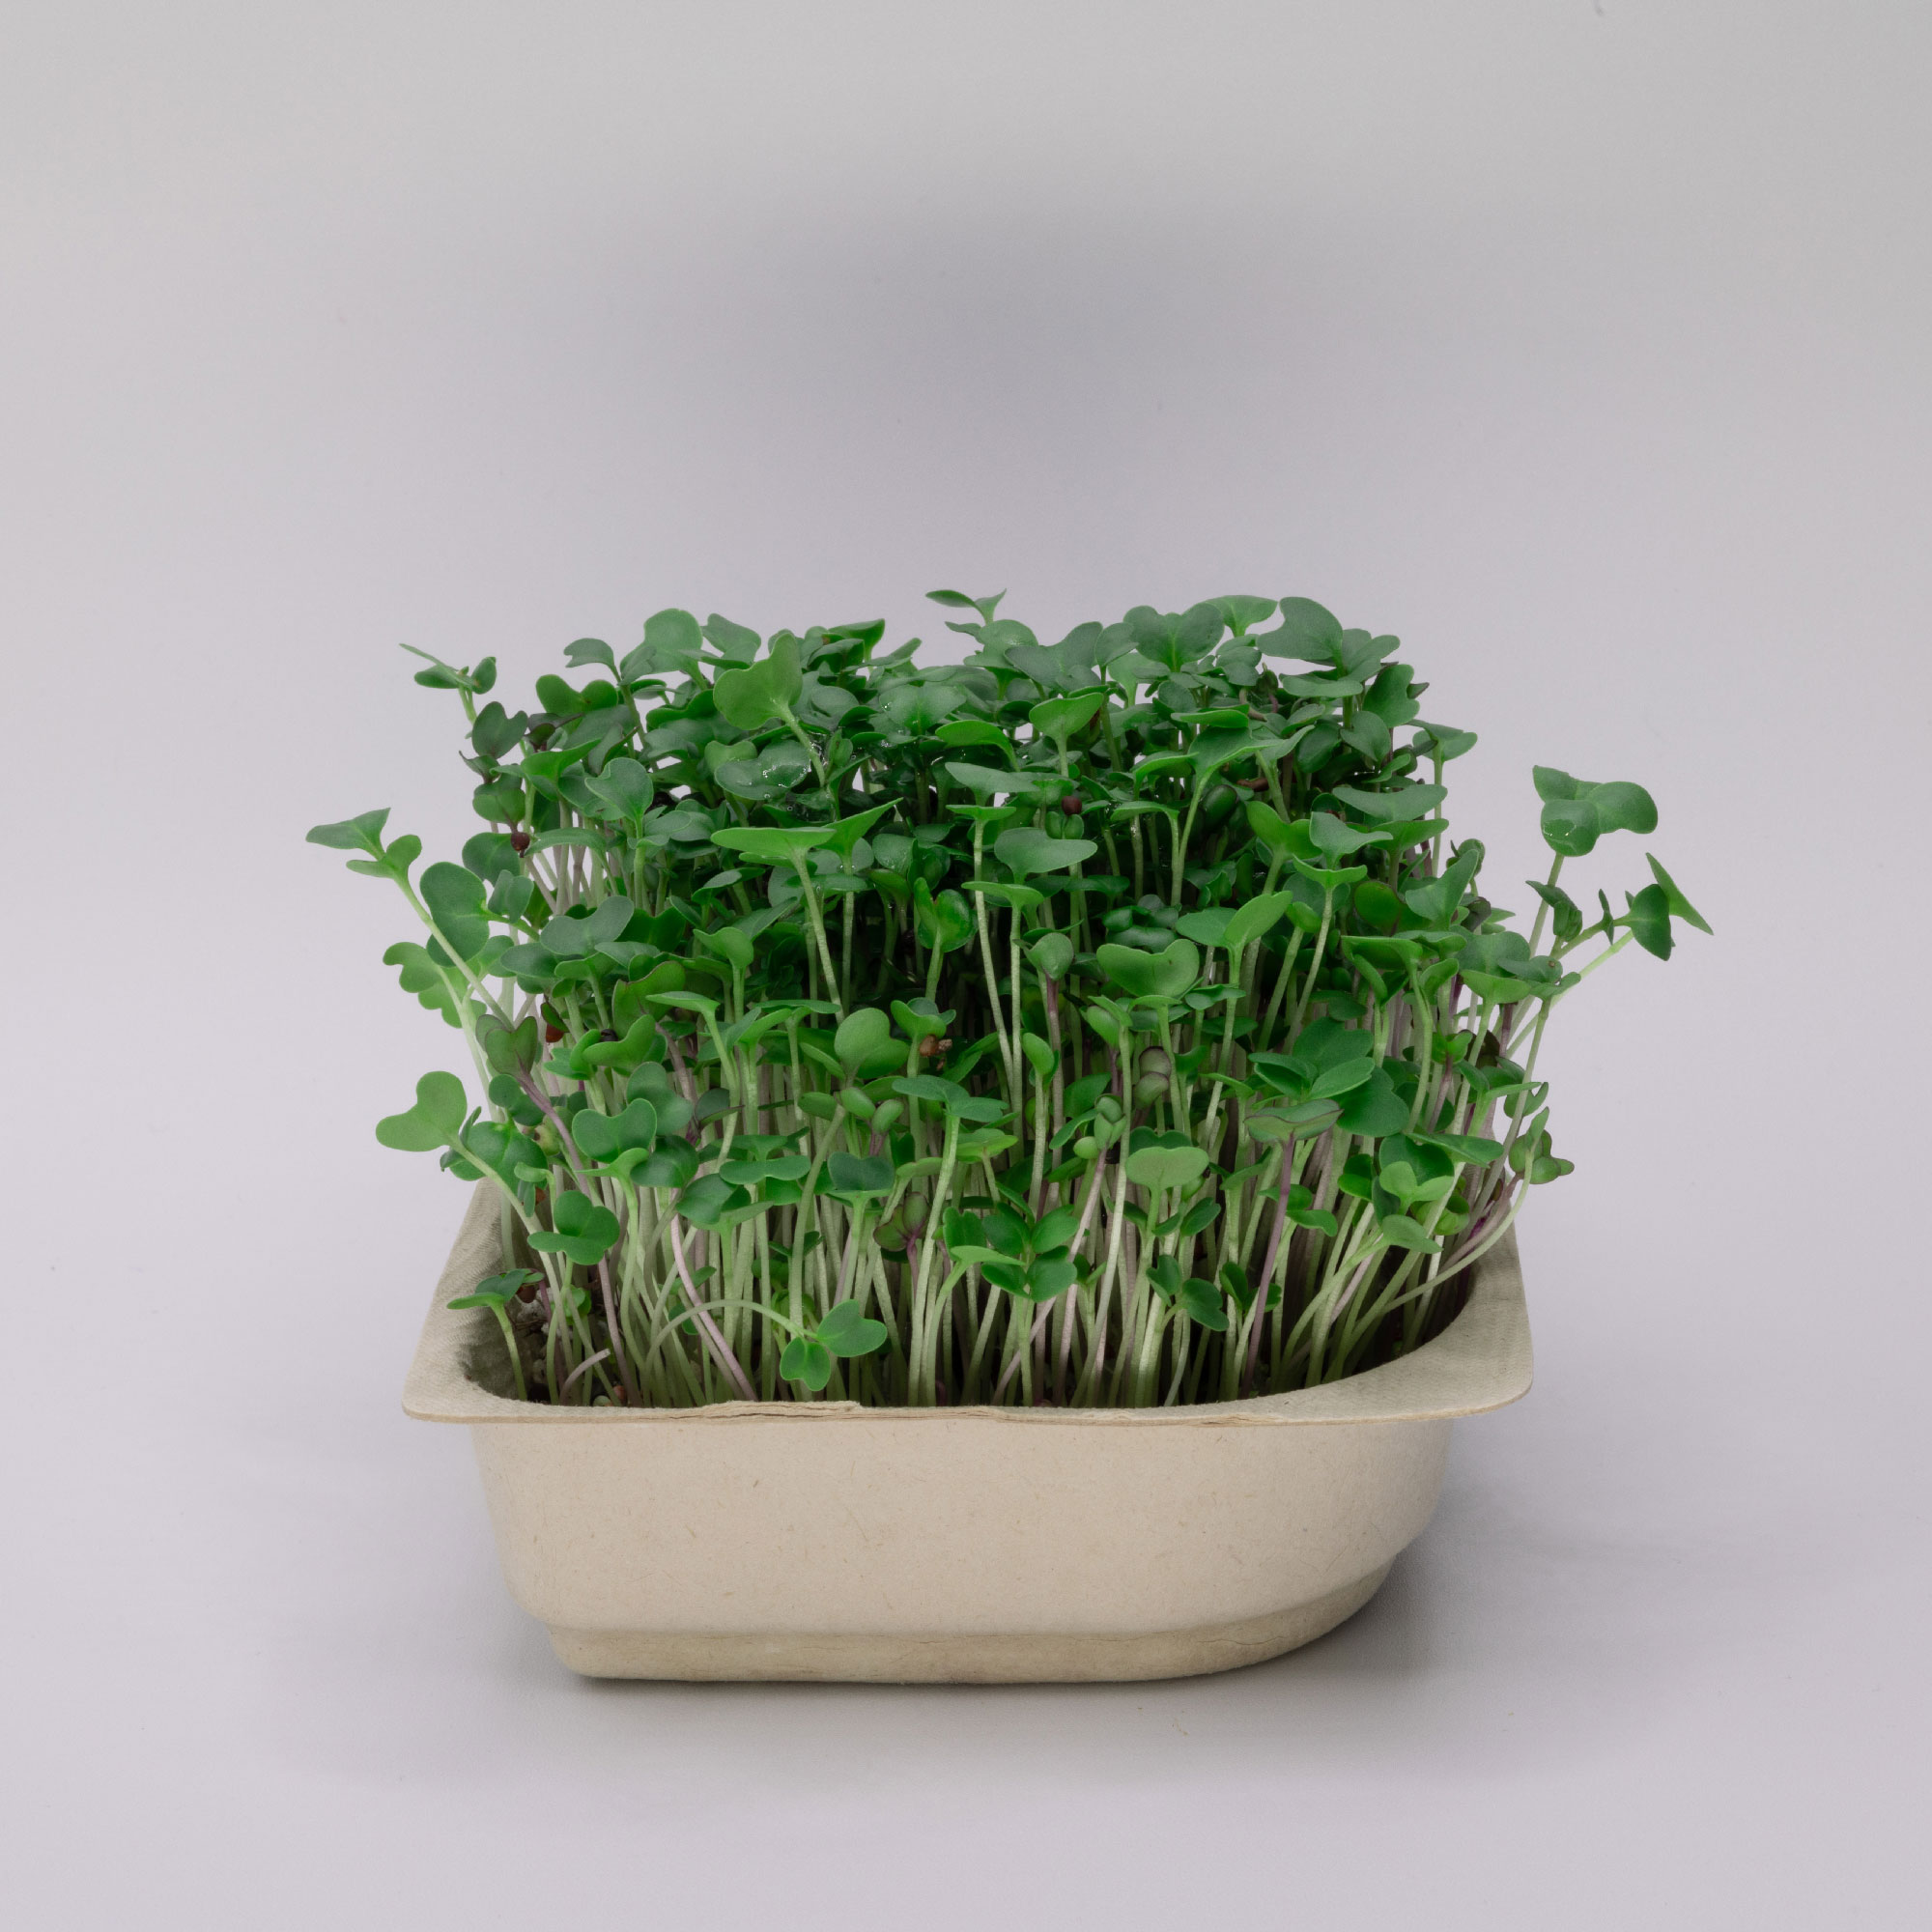
Harvest times on tray labels and this site are estimates, and can run longer depending on conditions like ambient temperature — they're not a guarantee. Reference photos of fully grown, ready-to-harvest plants below.
Hold the power button for 5+ seconds to turn the unit off.
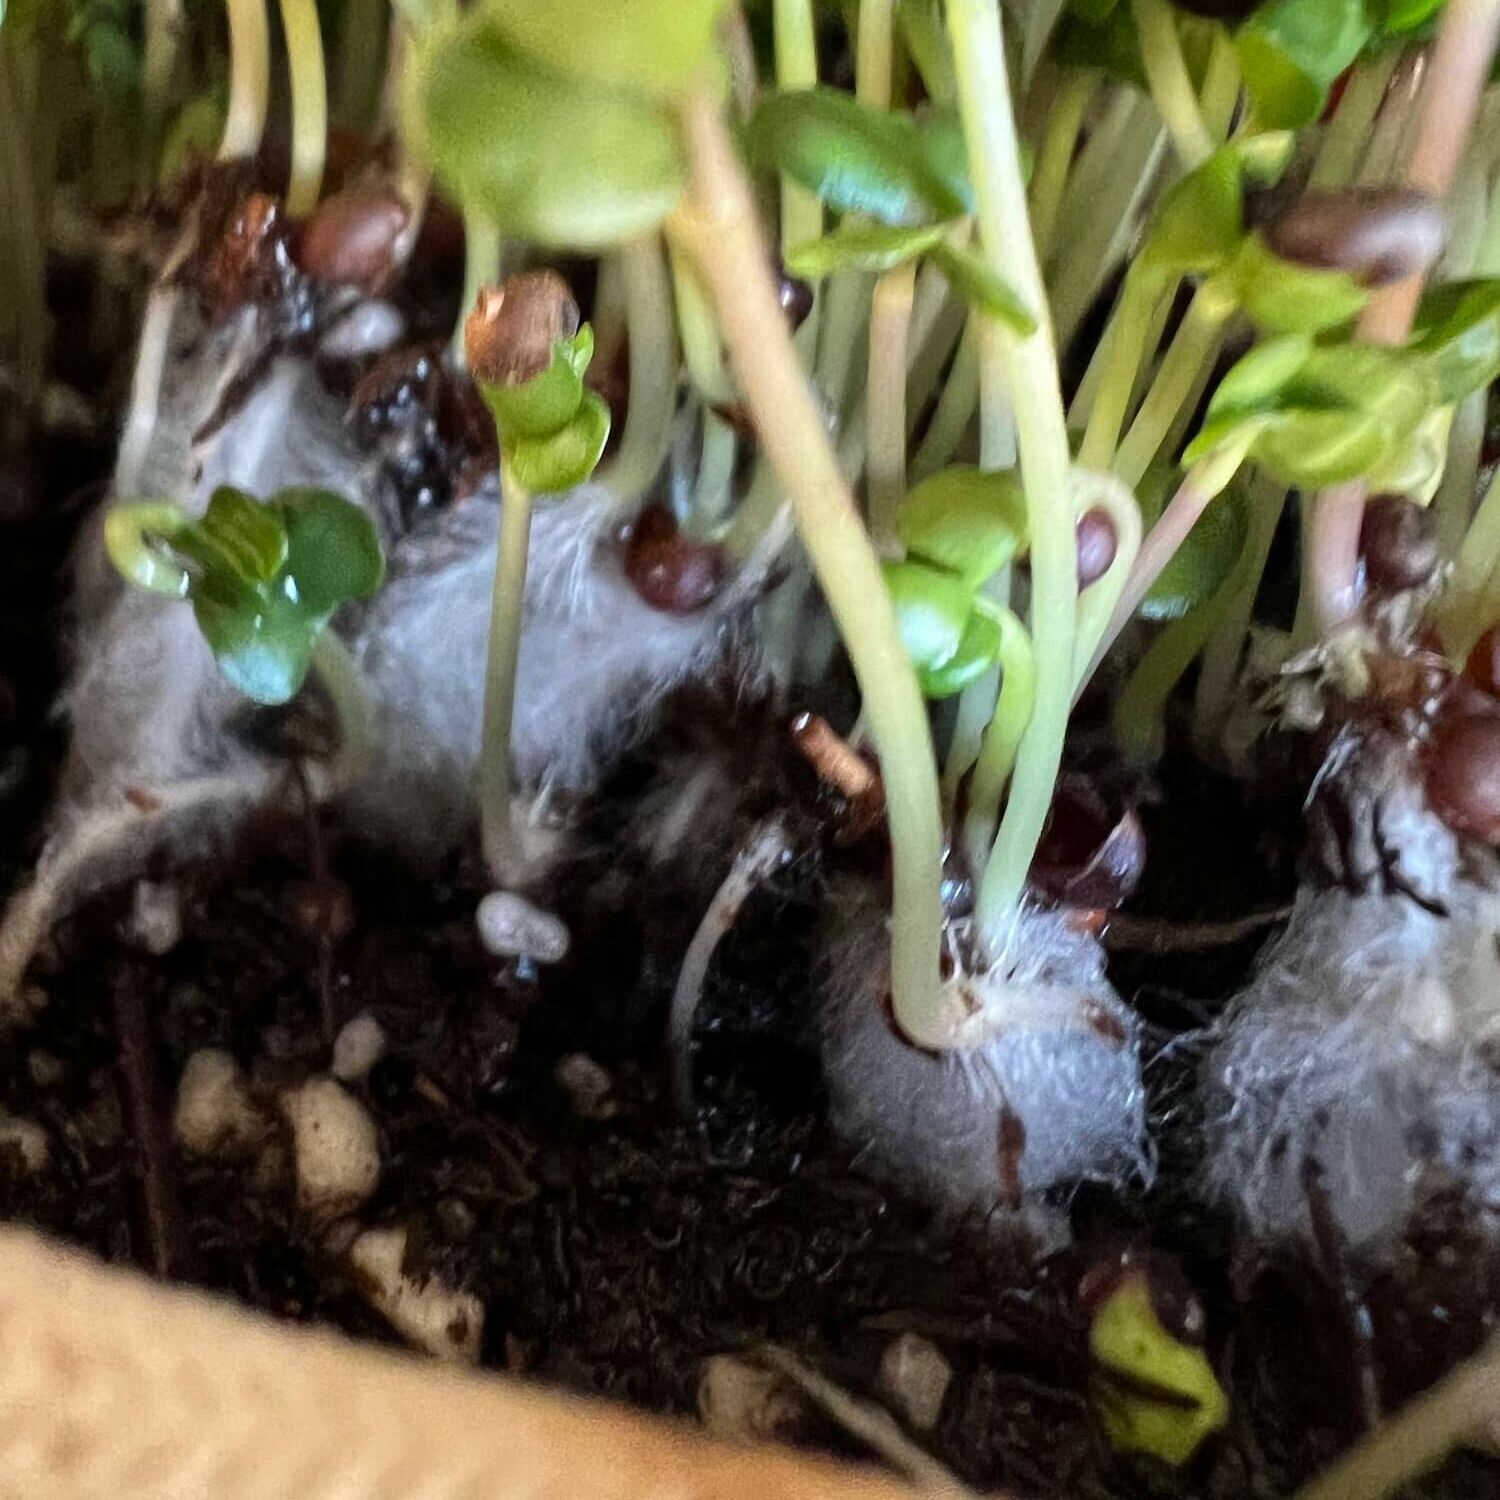
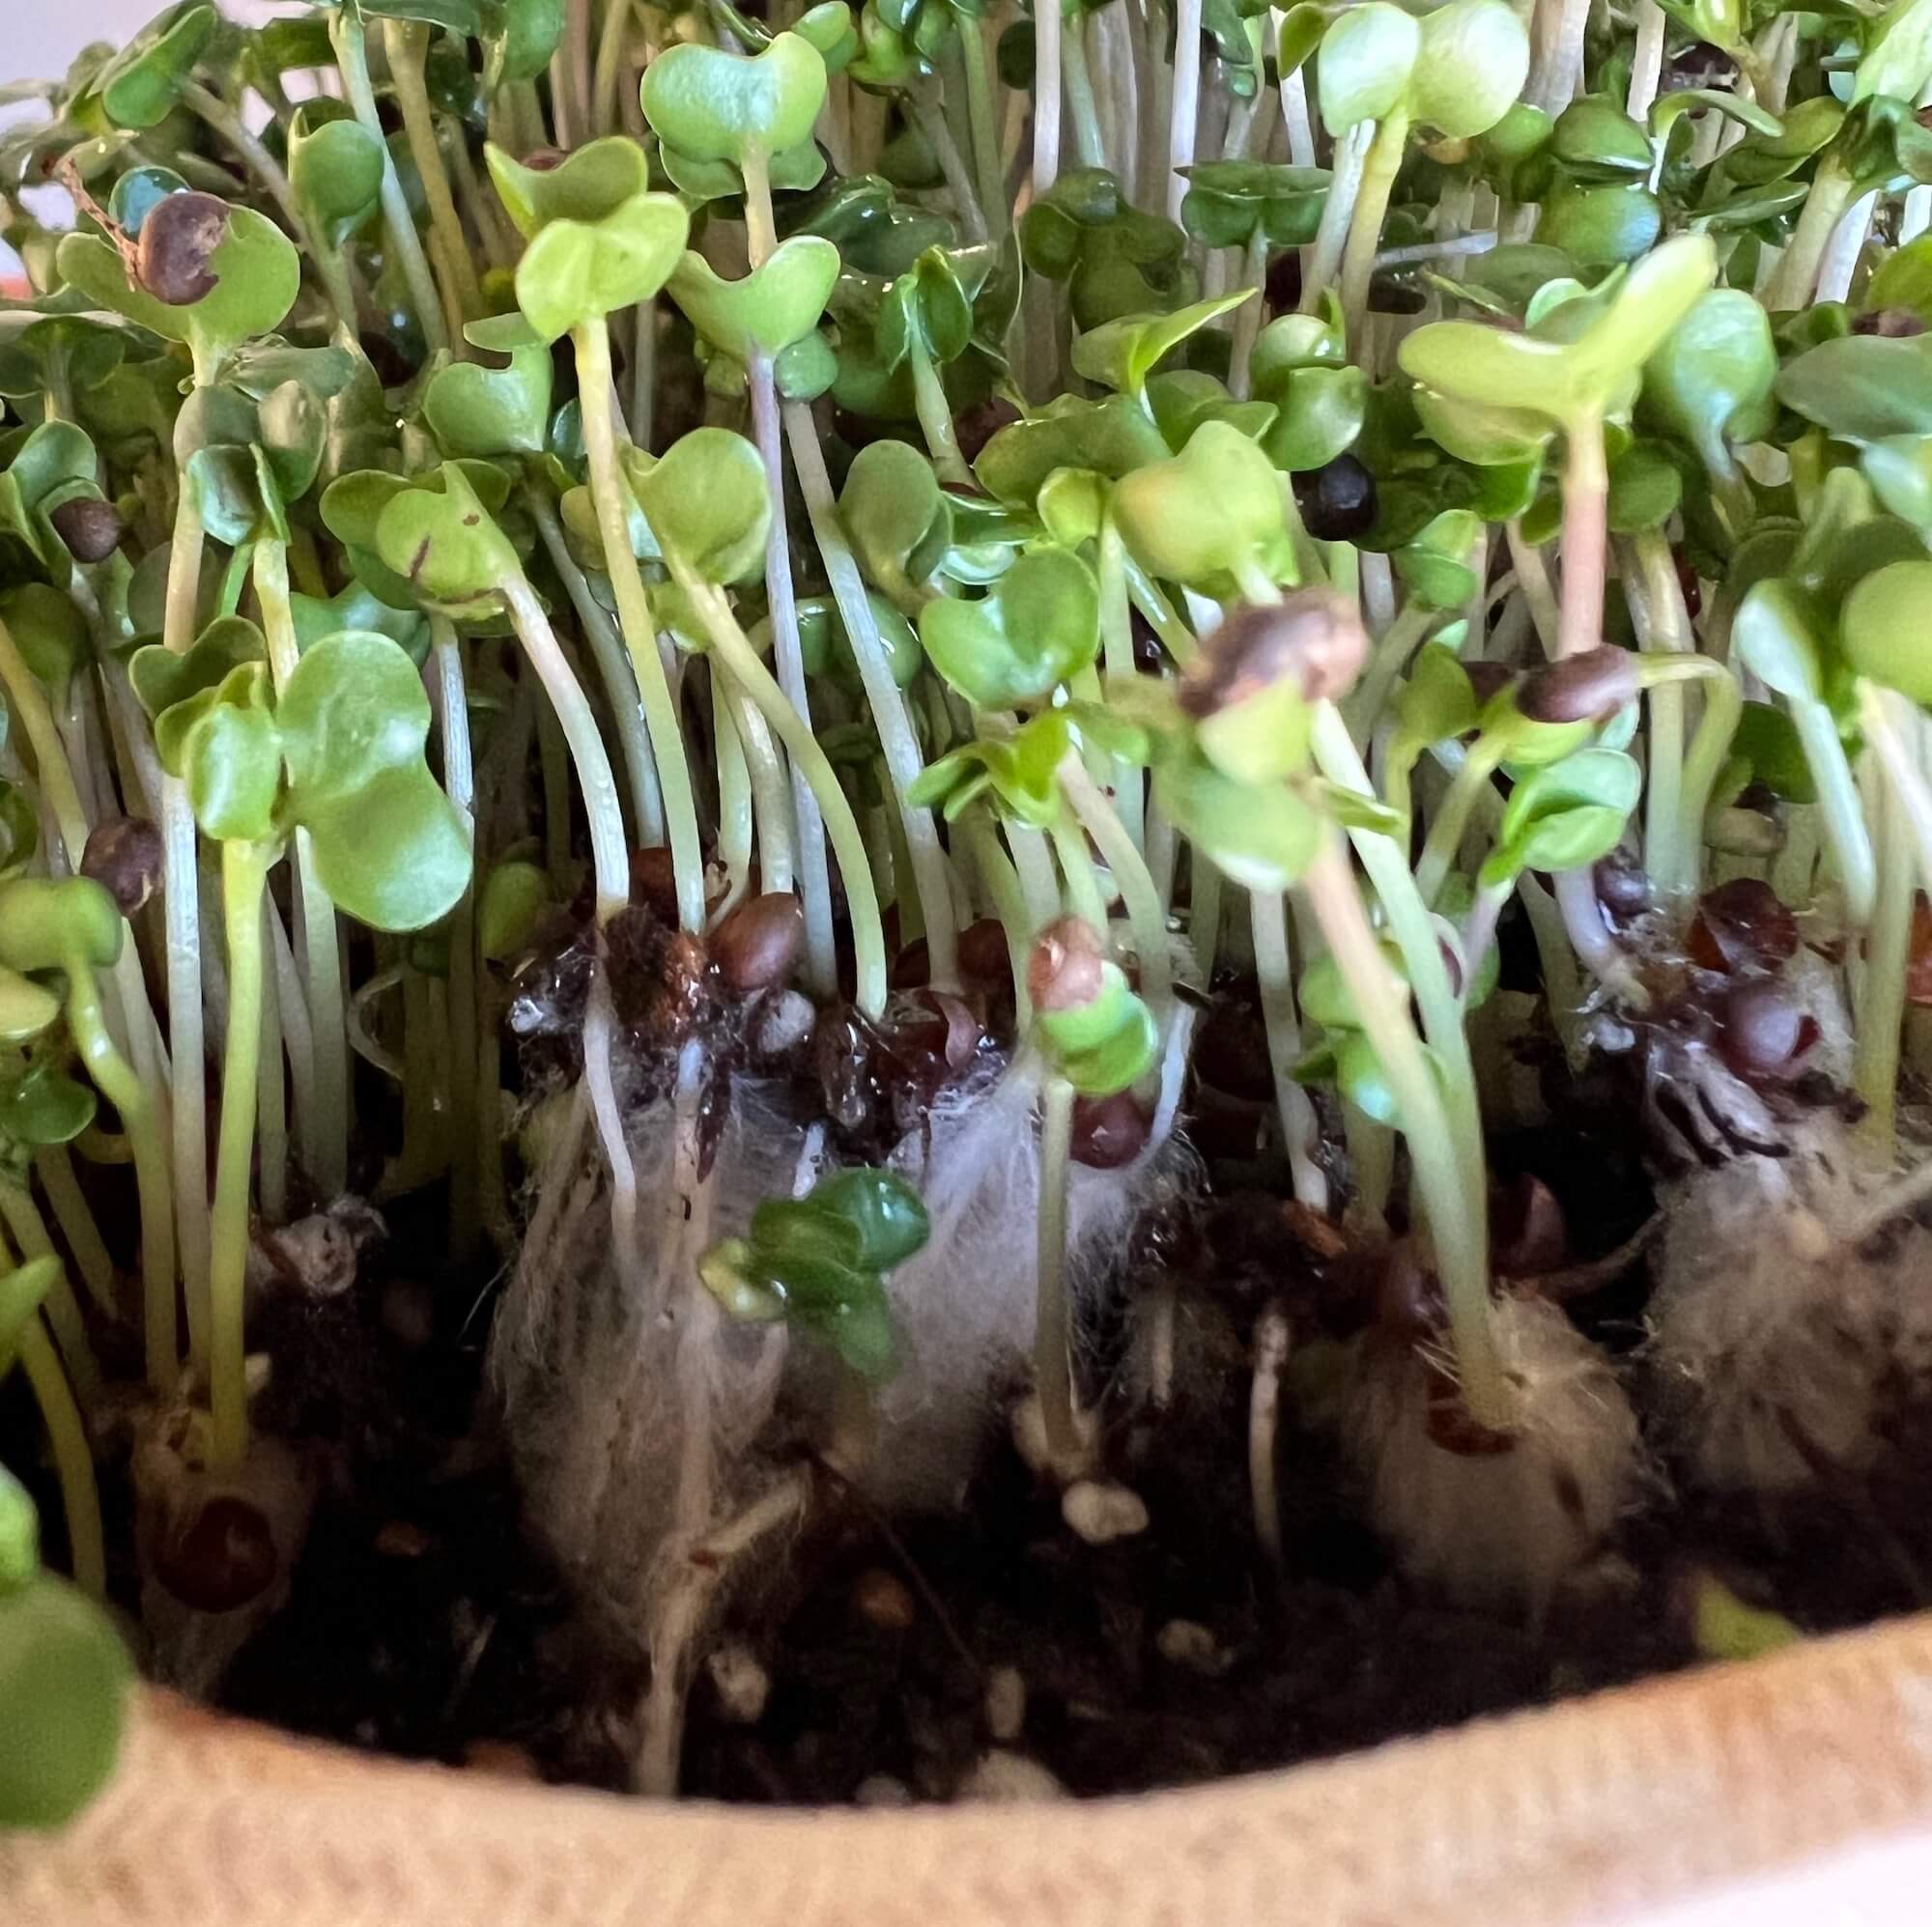
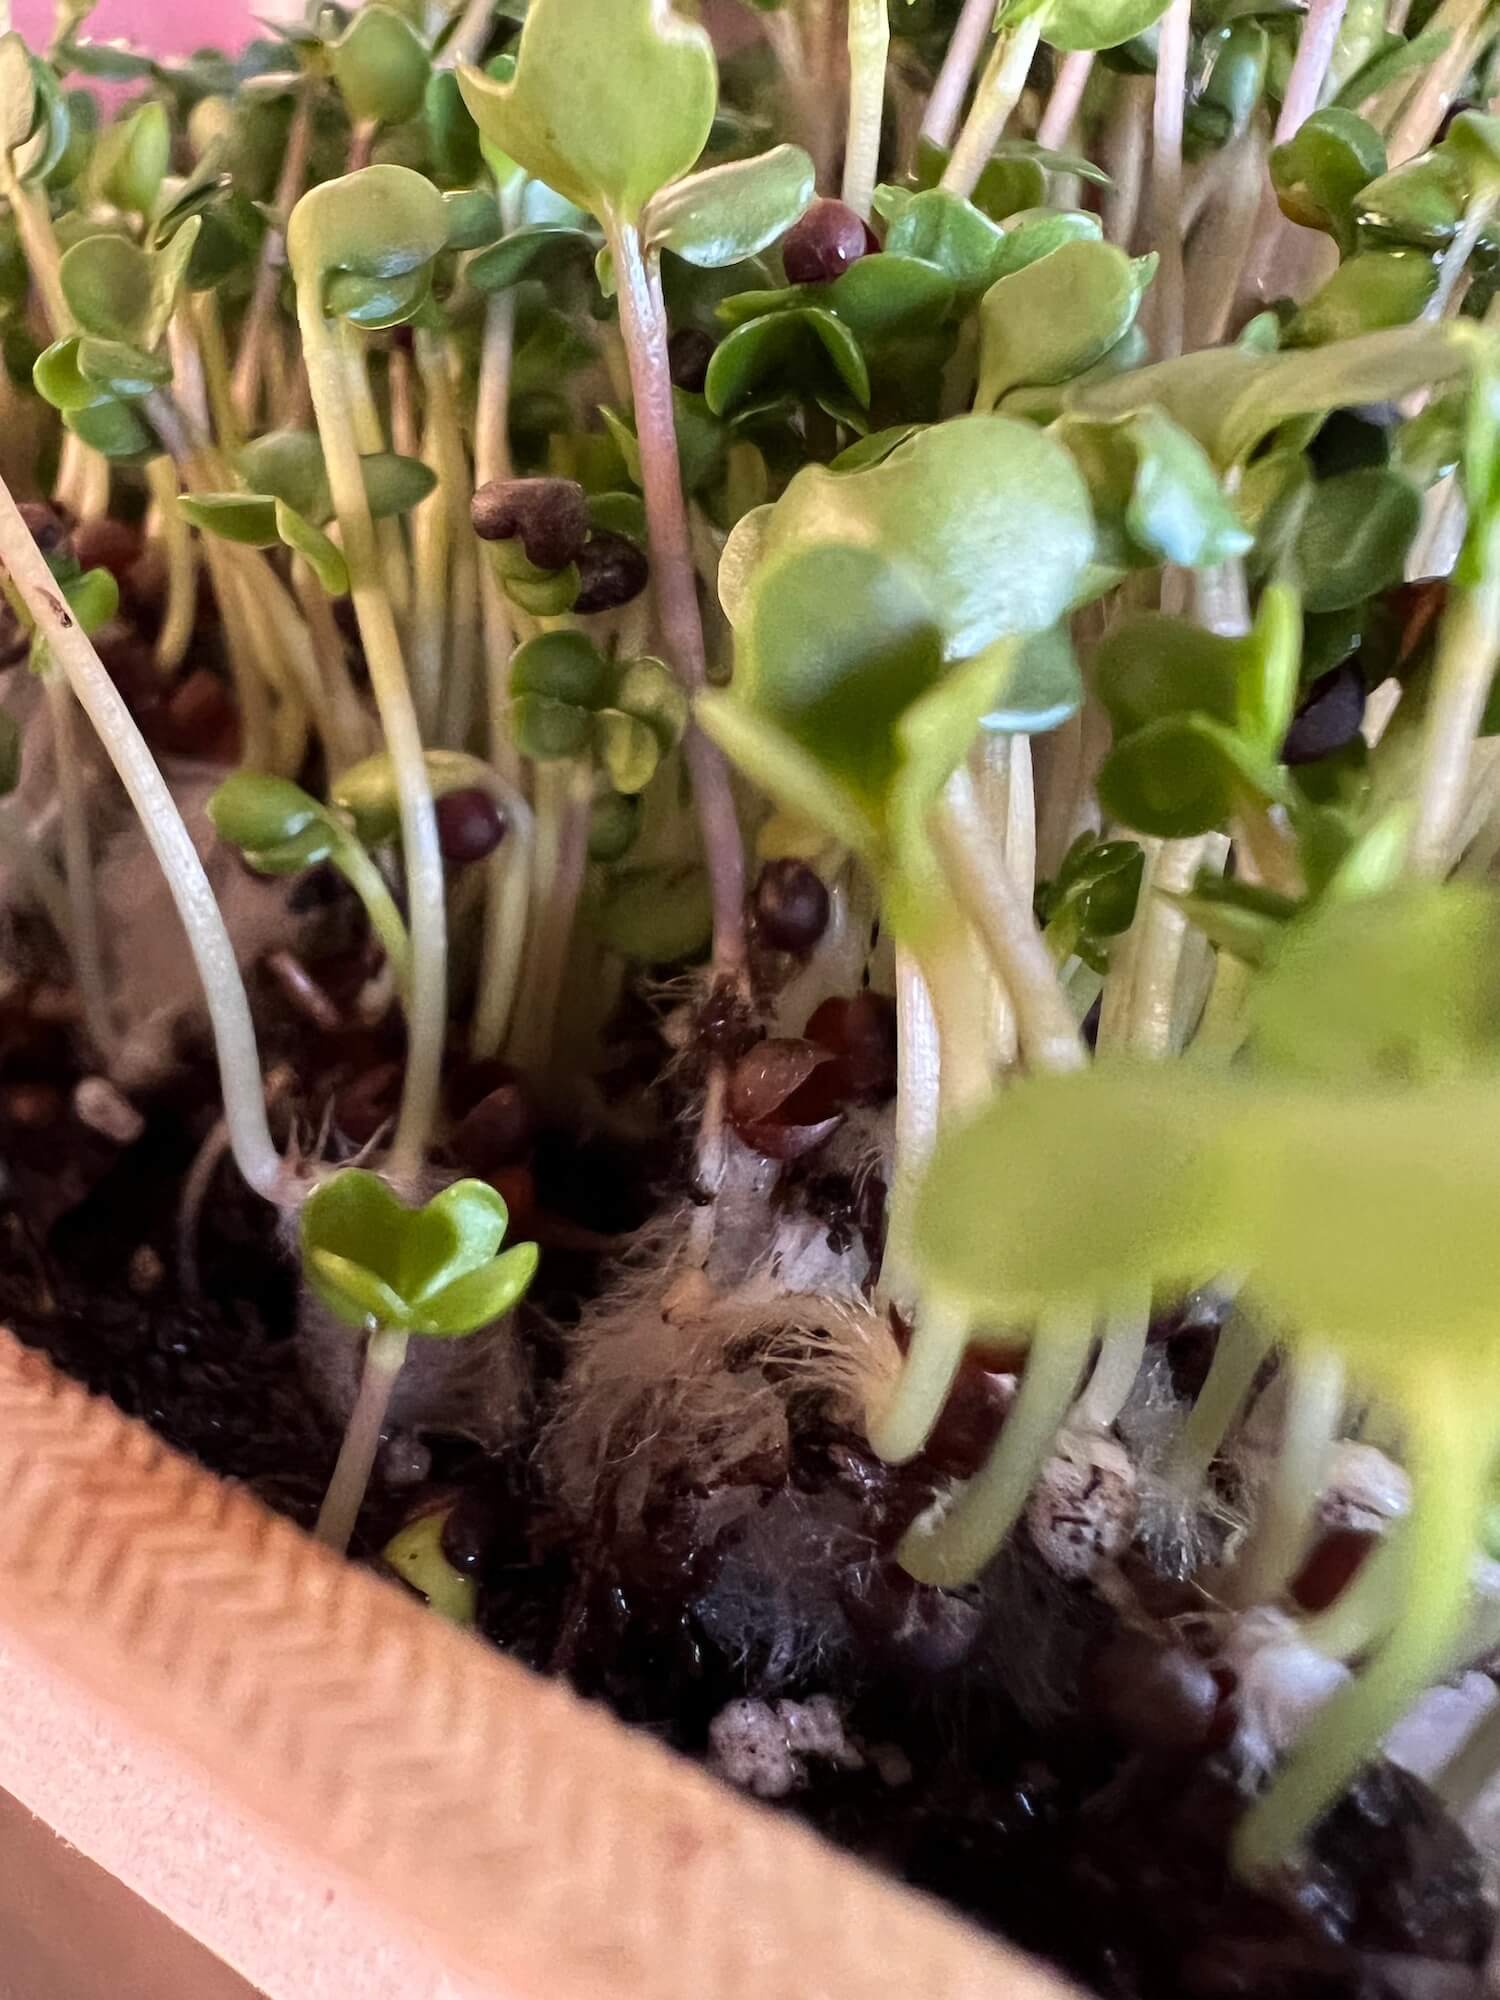
When microgreens first sprout, their tiny root hairs can look like mold, but they're actually a sign of a healthy plant with strong nutrient uptake. If what you're seeing isn't near the root, mold may have gotten in — many homes carry some ambient mold, and humid conditions can let it take hold in a tray. If this happens, add a tablespoon of 3% hydrogen peroxide to a full water tank to help clear it.
If your Instafarm is blinking red, check the following:
- The water tank is full and sitting flush on the dock (nothing caught under the magnets keeping it from seating fully).
- The watering head is moving to each tray properly — unplug the unit, plug it back in, and power on after the green light appears. The head should start moving within 15 seconds.
- The watering head is actually spraying each tray as it visits.
Still stuck? Let us know and we'll help troubleshoot — if the unit is making unusual noises, a short video showing the watering head (especially during the noise) helps us a lot.
Overwatering is usually caused by one of the following:
- Moving a tray between slots, or removing it for a period of time.
- Using your own soil or growing medium, or regrowing a tray.
- Leaving a tray in past its harvest-by date.
- Growing in temperatures below 68°F (this can be helped by lowering the watering amount in the app — reach out and we'll walk you through it).
If none of these sound right, contact our team with a photo of the affected tray(s) and we'll take care of you quickly.
Underwatering is most often caused by:
- A calcified watering nozzle (look for the same dry spot repeating across every tray).
- The unit sitting near a draft from a door, vent, or window — try relocating it, or increasing watering in the app.
If neither applies, contact our team with a photo of the tray(s) and we'll take care of you quickly.
The indicator light flashes red when the tank runs dry. Refill it, and the light turns back to green automatically once the unit senses water in the lines again.
That's perlite, which we add to keep airflow healthy at the roots for optimal growth. It's a completely natural, non-toxic material.
The Instafarm senses room temperature and humidity and adjusts automatically. Growth slows significantly, without guarantee, if the room stays consistently below 68°F — brief overnight dips typically won't affect growth much. Good growth also isn't guaranteed above 78°F.
Use filtered or distilled water — unfiltered tap water can clog the system. If the watering system does clog, clean the filter at the bottom of the water tank, or carefully unscrew the removable nozzle on the moving head and rinse it with warm water. Only remove the nozzle while the unit is powered off, since the head can be damaged easily, and take care re-orienting its small internal parts after washing.
Replacing the Watering Nozzle
Steps
- Restart the Instafarm. Unplug it, plug it back in, press the power button, and let the head travel out. Once it's accessible, unplug the unit again.
- Remove the nozzle. Unscrew it by turning left — use pliers if it's stubborn.
- Check for remaining parts. If the upper section of the nozzle is still in the head, unscrew and remove it with pliers.
- Install the new nozzle. Screw it in hand-tight.
Full App Walkthrough
A complete tour of the Instafarm app, from setup to monitoring your trays.
Wi-Fi Troubleshooting
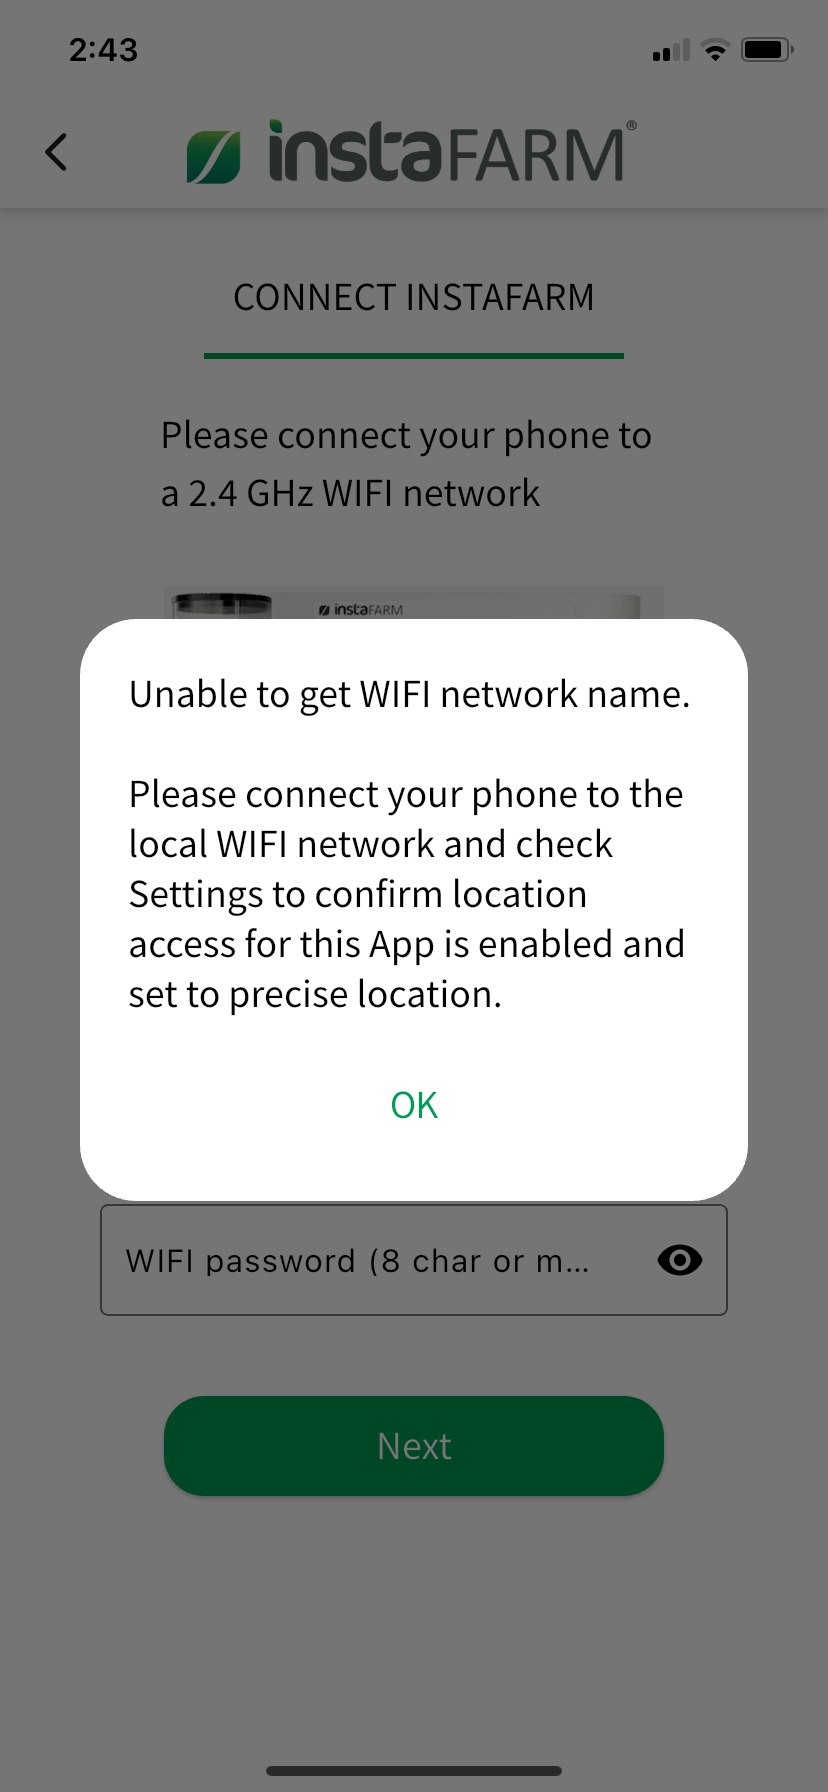
"Unable to get Wi-Fi network name"
- Confirm your phone is connected to your local Wi-Fi network. If not, connect it.
- iPhone: Settings → Privacy & Security → Location Services → Instafarm → set to "While Using the App" with Precise Location on. Return to the app and retry.
- Android: Settings → Apps → Instafarm → Permissions → Location → "Allow only while using the app" with precise location on. Return to the app and retry.
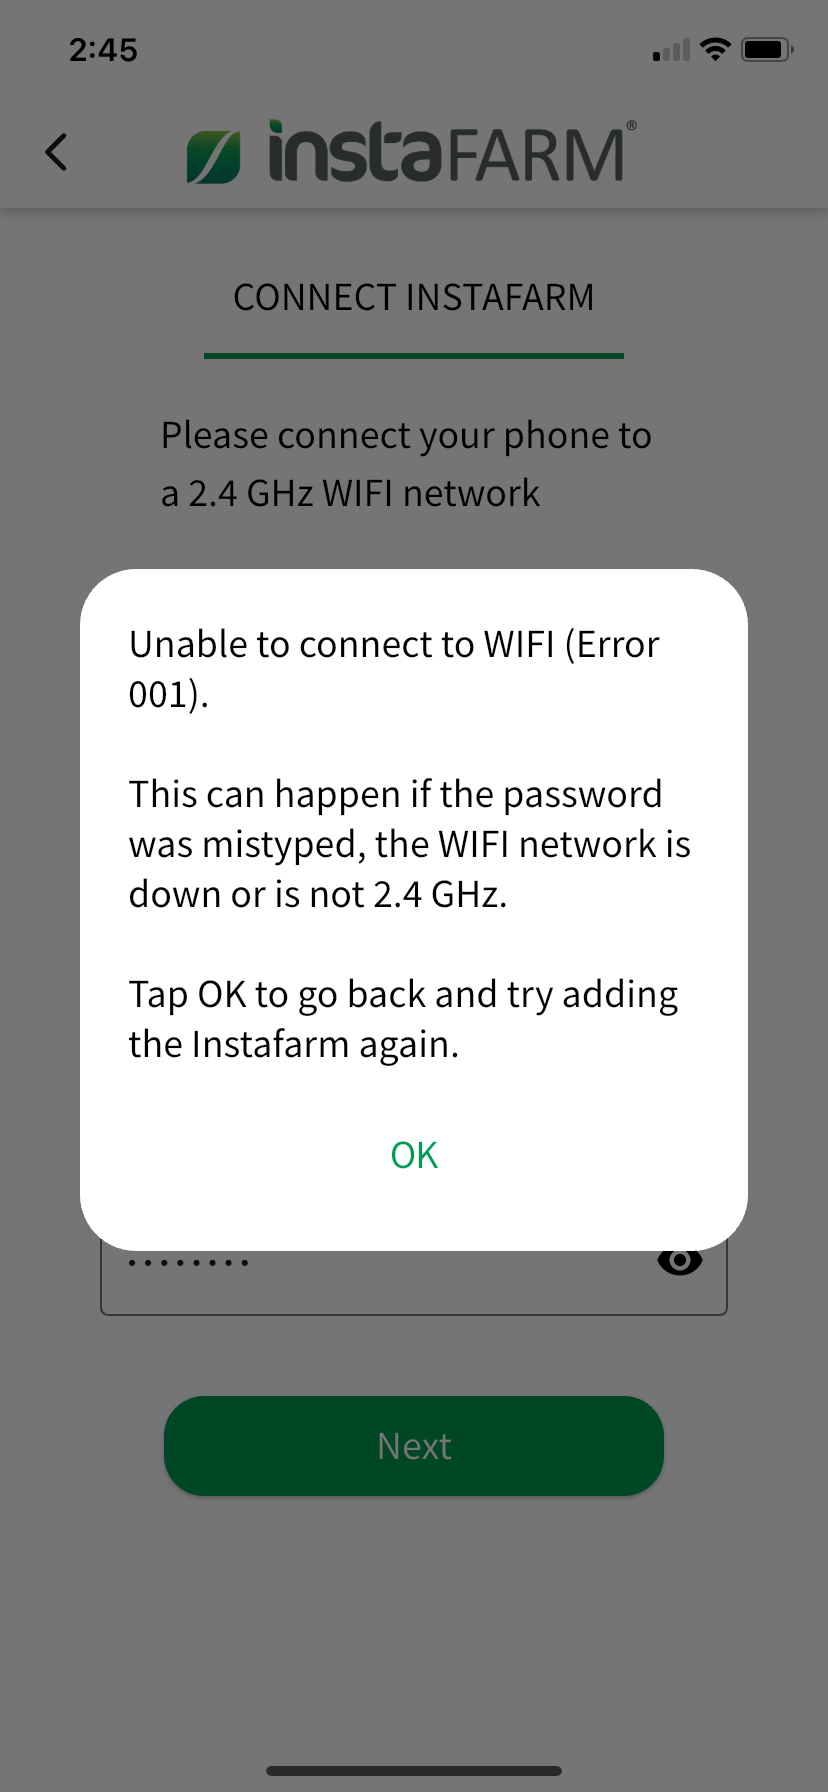
"Unable to connect to Wi-Fi (Error 001)"
- Confirm your router and network are up — unplug and re-power the router if needed.
- Double-check the Wi-Fi password (tap the eye icon to reveal it) and try again.
- Confirm you're on a 2.4GHz network — most home routers broadcast both 2.4GHz and 5GHz, and the Instafarm needs 2.4GHz.
- Reset the Instafarm's Wi-Fi: hold the button for 25 seconds and release (the LED should flash green), unplug and replug the unit and wait for the green flash again, then reconnect in the app.
Not sure how to check your phone's Wi-Fi band? Here's a quick guide for checking your Wi-Fi GHz on iPhone, or watch the video below.
We're here to help
Send us a message and, if it's a unit or tray issue, include a photo or short video — it helps our team diagnose things fast. We respond within 1 business day.
Contact UsHave questions or feedback?
Please fill out the form below.
Disclaimer
Instafarm® makes no claims or warranties as to the nutrient levels or health benefits of eating microgreens or plants grown in the Instafarm®. Speak with a nutrition or health professional, or reference authoritative sources, for guidance on these topics. Instafarm® does not sell pre-grown microgreens or food. We encourage customers to take precaution against bacteria or other organisms that can grow in plants — eating unwashed greens or produce may cause negative health effects.
Harvest Times
Harvest times on tray labels and this site are estimates only, and can run significantly longer depending on environmental conditions, including ambient temperature. Ready-to-harvest times aren't a guarantee of growth within that timeframe.
FCC Disclosure
This equipment has been tested and complies with the limits for a Class B digital device under part 15 of the FCC Rules, providing reasonable protection against harmful interference in a residential installation. It generates, uses, and can radiate radio frequency energy, and if not installed per instructions, may cause harmful interference to radio communications — though interference in a particular installation isn't ruled out. If this equipment does interfere with radio or TV reception (test by turning it off and on), try one of the following: reorient or relocate the receiving antenna; increase the separation between the equipment and receiver; connect the equipment to an outlet on a different circuit than the receiver; or consult the dealer or an experienced radio/TV technician.
Contains FCC ID: 2AC7Z-ESP32WROOM32E · Patent Pending